A clear coat plays a crucial role when it comes to maintaining the appearance and protection of your vehicle’s paint job.
However, it’s not uncommon to encounter issues with the clear coat over time, and one of the most frustrating problems that car owners face is clear coat bubbling.
Apparent coat bubbling refers to the formation of blister-like bubbles or raised areas on the clear coat’s surface, which can significantly affect the aesthetics and value of your vehicle.
There can be bubbles in the clear coat over the paint. As a result of the too-hasty application of the clear coat, this occurs.
Due to the hasty application, very small holes allow moisture into the paint, causing bubbling. Pop bubbles are also known as solvent bubbles.
It happens when the top skimming or clear coat is applied faster than the paint can escape or breathe, which results in pinhole-sized bubbles.
It is not a serious problem to have solvent pop bubbles. It should be possible to lightly sand them down and buff them. Consider watching a professional video before attempting this.
How Does Clear Coat Get Damaged?
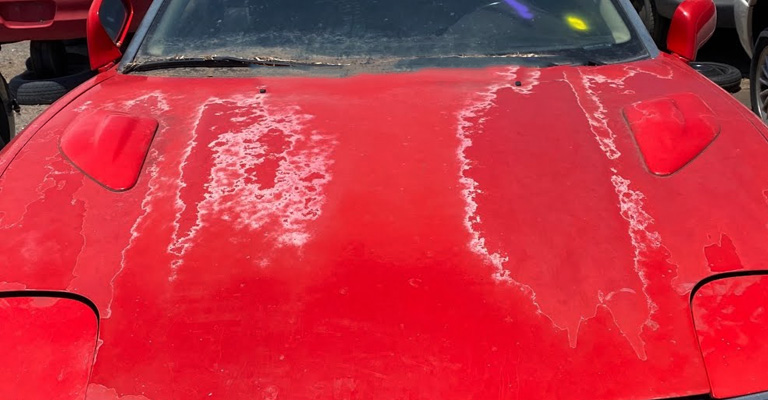
There’s a good chance that your car’s clear coat is damaged if your paint bubbles, blisters, or flakes. The more minor spots are easily fixed by buffing and re-painting, but large patches require a professional.
There are multiple factors that can damage your car’s paint, resulting in peeling or fading of your clear coat. These factors include UV radiation, ageing, and road debris.
Taking your car to a paint shop can be expensive, so fixing peeling clear coats yourself can be worth the effort.
Peeling clear coats involves deteriorating or broken bonds between the clear coat and the underlying color coat. Numerous factors may contribute to this problem, but the most common ones are:
- Manufacturing error
- Scratches and pits
- Road debris
- Prolonged exposure to the sun and UV rays
In older cars, you are more likely to experience peeling clear coats – which can be exceptionally bothersome when you are out of warranty.
Age/Wear
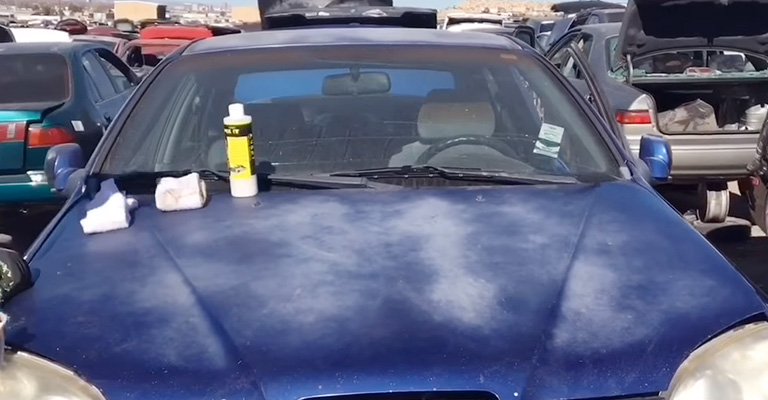
You may park your car indoors and live in a very dry climate, but the paint on your vehicle won’t last forever. Gradually, the paint becomes weaker and weaker, and it begins peeling, bubbling, and chipping. There is a phenomenon called delamination in this case.
Too Much Moisture
When too much moisture is in the paint mixture or the airlines, moisture can get trapped under the paint.
Occasionally, a freshly applied coat of paint has been exposed to a lot of moisture. You’ll notice that the paint on your car’s exterior begins to warp before thoroughly drying.
As a result, cars kept outside in humid, rainy, or snowy locations deteriorate more quickly. As a result of this deterioration, the paint will eventually start chipping.
Hot Painting Surface
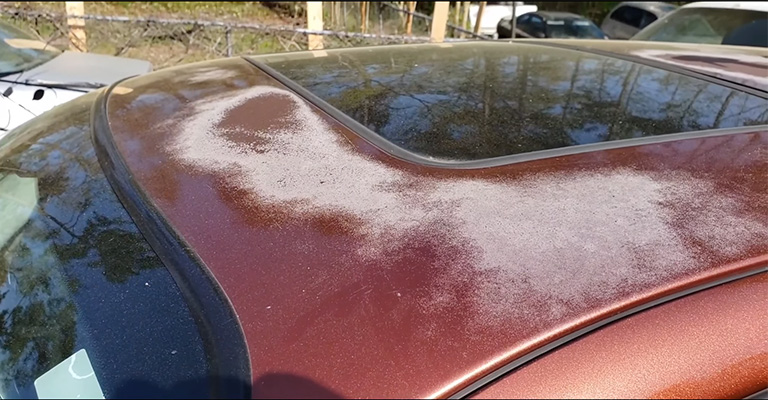
Putting paint on a too-hot surface causes it to warp as it dries. Sometimes, it may be impossible for the paint to adhere correctly to the car’s surface if it dries too quickly. Accordingly, the condition worsens over time and as the weather changes.
Make sure you don’t paint your car during the hot summer months. You should also avoid painting in direct sunlight.
Contaminated Painting Surface
It is important to paint over solid debris or moisture on the car’s exterior before the paint is applied.
Under the paint, there is air or moisture trapped in tiny little pockets. Therefore, you should always let a professional paint your car.
Weather changes cause these pockets to expand and contract. If moisture is trapped under the paint, the effect is even worse.
How to Repair Damaged Clear Coat on a Car?
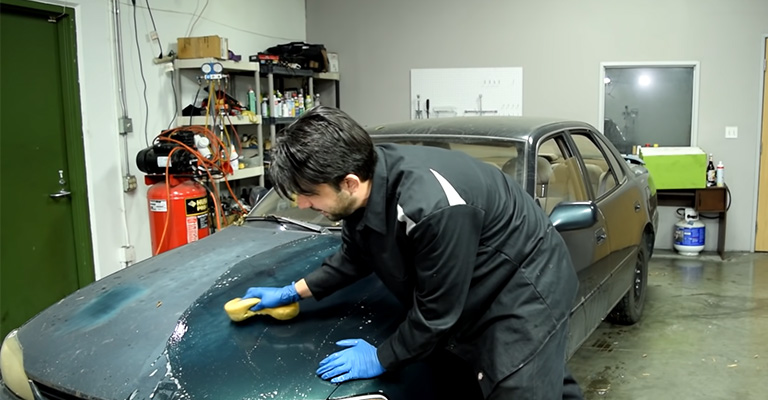
Repairing a peeling clear coat immediately with a miracle or easy fix may not be possible, but the right supplies and know-how won’t limit your options. Prepare the following items before you begin:
- Buffer
- Wax
- Clean microfiber cloths
- Rubbing alcohol (isopropyl)
- Degreaser
- Masking tape
- Aerosol clear coat
- Spray gun
- Car wash supplies (soap, wash mitt, microfiber cloths)
- Sandpaper (fine grit, multiple gradients)
1. Prep The Panel
Make sure the panel is dirt and debris-free by wiping it down. Use masking tape to cover the edges of adjacent panels, which will not be re-painted. Keep the tape inside the panel gap, not touching the repaired panel, to prevent peeling off your new clear coat!
2. Remove The Peeling Clear Coat
Sand the problematic areas first with fine sandpaper (automotive grade). You should use light to medium pressure to remove all peeling flakes. You should apply light pressure mainly on the borders of the color coat is visible.
3. Scuff Adjacent Areas And Create Blend Zones
The next step is to blend the repaired area in each direction after removing flaking and scuffing. With light pressure, rough the blend zone with the same sandpaper or 2000-grit wet sandpaper, so the new clear coat will stick well.
4. Final Clean
After cleaning with water, wipe with isopropyl alcohol or a tack cloth to remove any remaining debris. To ensure that the surface is dry before moving on, make sure it has been wiped with a dry cloth.
5. Mask The Work Area
If spraying near other panels, use masking sheets, plastic foil, newspapers, or paper towels to prevent the spray from crossing over.
Put tape over the work area, stopping somewhere within the blend zone, leaving a small part of the scuffed area visible.
When the paper is folded, you will have a soft edge at the perimeter. Once you’re done spraying, you can mix the old and new clear coats easier.
6. Apply Your Clear Coat
Before you start applying the clear coat, be sure to read the instructions provided by the manufacturer to ensure that you know exactly what to do.
You should shake the can vigorously again after you have released the hardener (usually by shaking the can and pressing a button on the bottom).
You don’t want to inhale anything! Wear a mask or respirator. To test the spray quality of the nozzle, spray for a few seconds. Practice on scrap metal if you don’t need the whole can, or if you have extra.
7. Blend, Polish, And Finish
When the clear coat has dried, remove the masking tape carefully to prevent stripping your new coating!
Typically, a line will separate the new clear coat from the rest of the panel. The area should be wet-sanded using 2000-grit sandpaper to ensure a good blend. When blending, apply gentle pressure and ensure the area remains damp.
Using a medium-cut polishing pad and a low-speed polishing machine is recommended. It is best to polish away from the new clear coat to avoid peeling it off.
Make sure the rotation is smooth by holding the machine at a slight angle, so the contact is on the narrow edge of the pad. Make individual passes using machine weight, raising and re-starting from the repair area as you go.
Tips For Applying The Clear Coat
- You should hold the nozzle eight inches away.
- Make sure your strokes overlap by 30-40% and use light to medium pressure.
- Do not spray everywhere or only at one location; go back and forth periodically.
- Don’t run or drip when moving slowly.
- When you have finished your stroke, release the button.
- Apply two to three coats, allowing each coat to dry for ten minutes between each.
DIY vs Professional Repair
If the peeling or damage is more significant than a cup coaster, it would be best to have a professional repair your car.
You may be able to do this yourself, but this could lead to further damage to your car, depending on the severity of the issue.
Clear coat applications can cost anywhere from $500 to $10,000, depending on the severity and extent of the damage.
Tiny Bubbles
In a tiny bubble, the bubbles are uniform across the panel. Paint bubbles are caused by moisture present during the painting process.
Tiny bubbles will form if you paint a car within the airline with too much humidity. Unfortunately, such paint bubbling can only be repaired by refinishing the panels.
What About Large Automobile Paint Bubbles?
In case your car has paint bubbles larger than a quarter or half a dollar, it is a more serious issue. In most cases, when there are larger paint bubbles on a vehicle, especially a newer model, the paint job has been poorly done.
There may also be rust underneath the paint or poor bodywork caused by large bubbles. You can use a patch paint kit repair when a large bubble develops in the paint.
Nevertheless, you should contact a professional auto body shop if you would like to re-paint the sites. Most bubbles occur on one or more panels or sections of the vehicle, so painting the entire vehicle may not be necessary.
The Bottom Line
It is generally recommended that auto paint repair be left to professionals. While DIY solutions can be beneficial, there’s a lot of risk involved and a learning curve, and there’s a chance that you may undermine the problem.

