Your Honda Ridgeline may have been your trusty companion for years. But when your headlights aren’t properly aligned, this very same old pal will make it difficult, even dangerous, for you to navigate.
Not only does this pose a safety hazard, but it can also lead to unwanted attention from law enforcement.
Luckily, adjusting the headlights on your Honda Ridgeline is a job anyone can do without spending much money, time, and effort. There are a few simple tools and steps that need to be followed.
In order to ensure your safety while you drive, whether day or night- this article will walk you through these steps, so let’s get started!
Tools and Preparations
Adjusting the headlights of a Honda Ridgeline or any given car is mechanical work, which requires tools and preparation.
So, it is better you gather around those tools and be done with all the preparations before you begin.
Tools
Depending on the situation, you may require the following tools to adjust the headlights on your Honda Ridgeline-
- Phillips head screwdriver
- Measuring tape or ruler
- Masking tape
Preparations
Make sure that the following matters are taken care of before you begin. If not, then unwanted challenges may arise:
- Find a level surface where you can park your vehicle facing a flat wall or garage door. The area should be well-lit, and you should be able to park your vehicle a minimum of 25 feet away from the wall.
- Turn on the headlights before you begin the adjustment process.
- Clear any dirt, grime, or other debris from the lenses of the headlights. Also, ensure they are not cracked or damaged. This can help you see the beams more clearly when adjusting them.
- Measure the distance between the ground and the center of each headlight. Then mark the same height on the wall with a piece of masking tape. This will allow you to determine if the headlight beams are properly aligned later on.
- Measure and mark each headlight beam’s vertical and horizontal center lines on the wall using masking tape. This will help you ensure that the beams are aligned properly and not pointing too high or too low.
Once done with the abovementioned matters, you will be ready to begin the main process now.
Adjust the Headlights on Honda Ridgeline
You cannot just grab and start to adjust the headlights. The process consists of multiple steps.
To explain those steps easily, we have broken down the whole procedure into small segments.
All you have to do is- properly follow the instructions below.
Mark the Center
Step-1: First, measure the distance between the center and the ground. You can use a measuring tape to do this.
Step-2: Then, use masking tape to mark the height of the headlight at the same distance from the ground.
Step-3: Next, using the same masking tape, mark the center of each headlight’s vertical and horizontal beam on the wall. This will allow you to determine if the headlight beams are pointing straight ahead.
Step-4: Measure the height between the headlight and the ground for the vertical center line. Then measure and mark the same height on the wall from the ground level. This mark will represent the vertical center of the headlight beam.
Step-5: Now, you need to mark the horizontal center of the headlight beam. To do that, measure the distance between the center of the two headlights.
Step-6: Once done, measure and mark the same distance on the wall from the vehicle’s center line. This is the mark that will represent the horizontal center of the headlight beam.
Now that you have both the horizontal and vertical center points. They will clearly refer to the point to ensure the headlight beams are properly aligned during the adjustment process.
Mark the Height
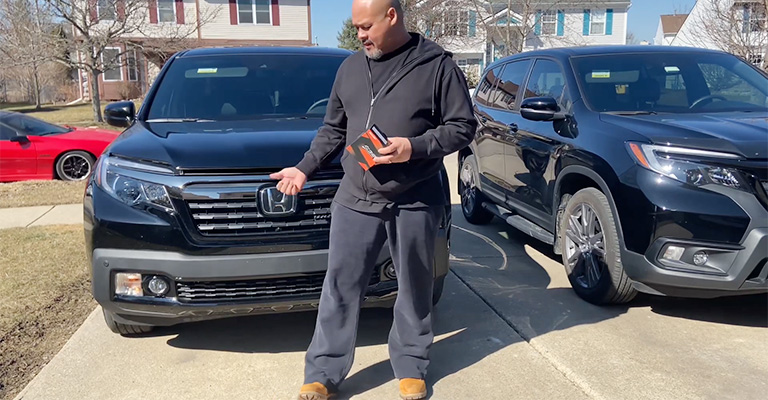
As you have a center point marked, now, you need to find out the height for the same reason.
Step-1: To mark the height- stand in front of the headlight you want to mark.
Step-2: Hold the end of the measuring tape or ruler against the ground in front of the headlight.
Step-3: Extend the measuring tape or ruler upwards, keeping it parallel to the ground, and measure the distance from the ground to the center of the headlight lens.
Step-4: Stick a piece of masking tape on the wall at the same height as the center of the headlight so you have a clear reference point for your headlight adjustment.
Step-5: Repeat the above process for the other headlight.
By marking the height of each headlight on the wall using masking tape, you will have a clear reference point to ensure that the headlight beams are at the correct height during the adjustment process.
Locate Adjustment Screws
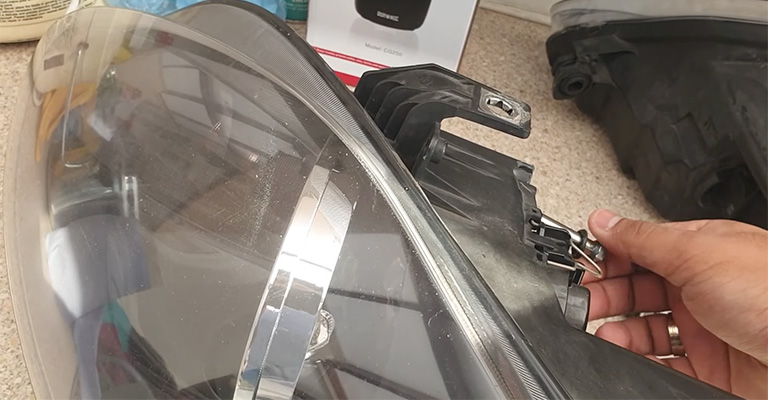
Headlights are held with the car using a number of screws. So, in order to adjust, you need to locate the adjustment screws first.
These screws are not hard to find. Just open the hood of your Honda Ridgeline and locate the headlight assembly. You’ll see the headlight housing and the bulb. Look for the two adjustment screws behind the headlight assembly.
On the Honda Ridgeline, the adjustment screws are typically located on the top and side of the headlight housing. One screw adjusts the up and down movement, while the other screw adjusts the left and right movement of the headlight beam.
Adjust the Screws
As of now, you must have located the center of horizontal and vertical lines, the height, and the adjustment screws.
Now, it’s time to do the main job for what you’ve been breaking your sweat up until now- adjusting the headlights.
Step-1: Take the head screwdriver and turn the adjustment screws in the direction you want the headlight beam to move.
Step-2: If you need to raise the beam, turn the adjustment screw clockwise. If you need to lower the beam, turn the adjustment screw counterclockwise.
If you want to move the beam to the left, turn the adjustment screw counterclockwise, and if you have to move it to the right, turn the screw anti-clockwise.
Step-3: Make small adjustments first, and check the results on the wall.
Note: Remember that even a small mistake can make a big difference. So be patient and take your time.
Repeat the process for the other headlight, ensuring that both headlights are adjusted to the same height and pointing in the same direction.
Tips and Precautions
Here are a few extra tips and precautions that may benefit you.
- Ensure your Honda Ridgeline is fully loaded with all the usual weight, such as fuel, passengers, and cargo.
- Avoid using pliers or other tools. They may damage the screws and make it difficult to adjust the headlights properly. Instead, use Phillips head screwdrivers to adjust the screw.
- Make small adjustments to the screws and check the results on the wall. Remember that even a small adjustment can make a big difference in how your headlights illuminate the road ahead, so be patient and take your time.
- When adjusting the screws, keep the headlights level and pointed straight ahead to ensure the best visibility and avoid blinding other drivers on the road.
Conclusion
Which car is more dangerous- the one without headlights or the one with misaligned headlights? The answer is probably the second one. The first one doesn’t guide you, whereas the second one misguides the driver.
However, this article has brought every little information about adjusting headlights on a Honda Ridgeline car. We have cracked the whole process for you, so all you have to do is ensure they are done right.


