The valve adjustment is often neglected on many six-cylinder single overhead camshaft gas engines manufactured between the mid-1950s and early 1970s. There will be problems if no adjustments have been made for years.
This is especially true if you do not have the right tools or know how to avoid potential pitfalls. When working on real old engines, the factory manual often doesn’t cover unique problems you might encounter. You may have to modify a few tools to get the job done right.
Unless you have the necessary tools and are mechanically proficient, you should have these procedures performed by an engine manufacturer’s service dealer. Procedures for servicing an engine can be found in the shop manual.
How Do You Adjust Valve Clearance?

Step 1:
All valve covers should be removed from the engine.
Step 2:
Rotate the crankshaft until TDC #1 is reached. Determine when the engine is at TDC by looking at the flywheel markings.
The closest cylinder to the flywheel is cylinder #1, so check the rocker’s arms. It is safe to check and set valve lash when the rocker arms are slightly loose and can be moved around a little.
Check the rockers of cylinder #1 if they have not moved slightly after rotating the crankshaft 360 degrees until they are at TDC #1 again. Watch the rockers on cylinder #1 as the crankshaft rotates to verify that the camshaft is in the correct position.
To set the engine for timing, the crank should be rotated 360 degrees if the rockers move as the crankshaft approaches TDC #1.
Upon approaching TDC #1, if the rockers on cylinder #1 don’t move, the timing is correct, and the valve lash can be checked. The picture below indicates an arrow indicating the valves to be installed.
Step 3:
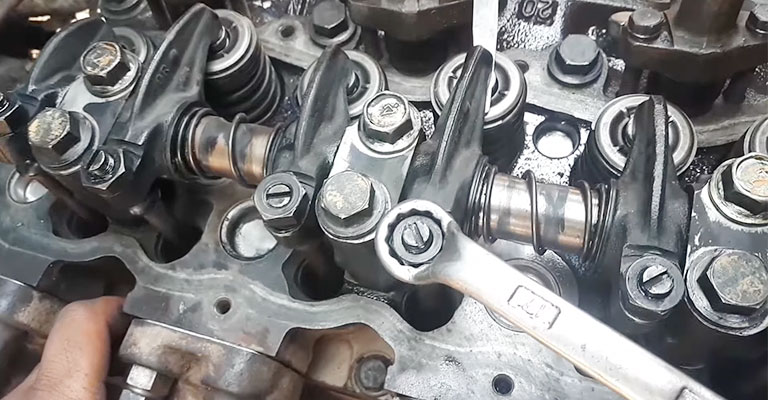
The lash adjuster nut should be loosened with a 17 mm wrench. To set the valve lash adjuster, place a screwdriver in the gap between the rocker arm and the valve tip so that the feeler gauge of your desired thickness fits.
You should be able to slide the gauge in and out – don’t clamp the rocker arm onto the gauge.
Step 4:
With the locking nut tightened with a 17mm wrench, hold the adjuster in place while using a screwdriver to hold it in place. It would help if you did the same thing for all the white-arrowed valves.
Step 5:
To return the crankshaft to the mark on the flywheel that indicates TDC#1, all six valves need to be measured, adjusted, and marked once again. When you pull the rockers in cylinder #6, which is the one closest to the crank pulley, they should move slightly.
Step 6:
The six valves marked with a black arrow on the drawing above need to be adjusted and marked again in step 3.
Final Words
In order to ensure that all valves are adjusted properly, all jam nuts should be tightened, and all valves should be adjusted to the correct clearance.


