The process of replacing a head gasket can be challenging. Nevertheless, even someone without extensive mechanical expertise can handle the task. Following the proper process and paying close attention to detail is the key.
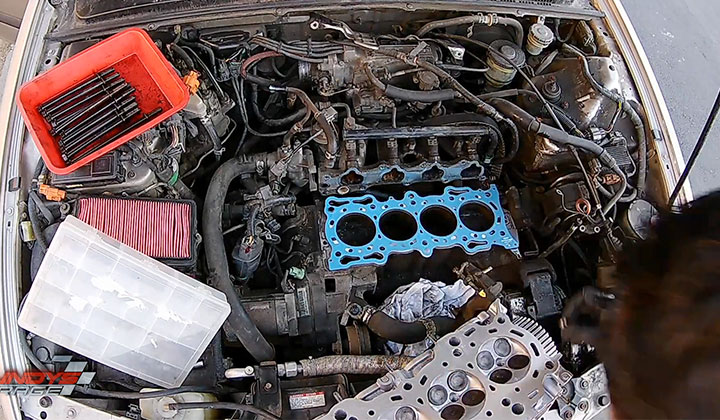
Before attempting this tutorial, you must have removed the cylinder head and rockers, exposing the head gasket. Here are the steps for removing, cleaning, and replacing the head gasket.
How To Repair Honda Accord Head Gasket?
You will learn how to replace the head gasket on your Accord by following the steps below.
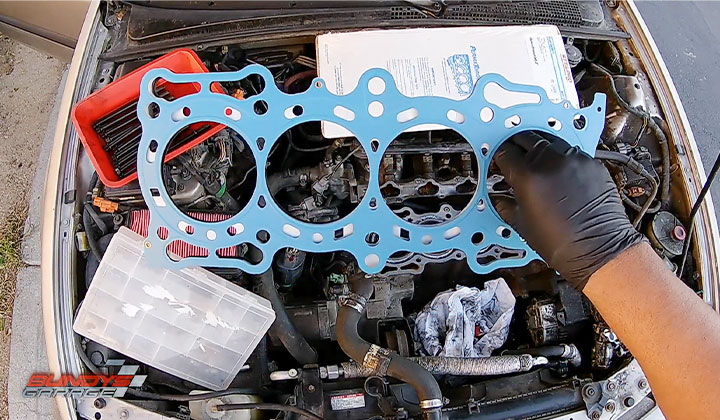
Removing The Gasket
It is necessary to peel up the head gasket to remove it. Run a razor blade underneath the gasket as close to the surface as possible if the gasket is sticking in some places. The cylinder head’s engine block and mounting surface should not be gouged or nicked.
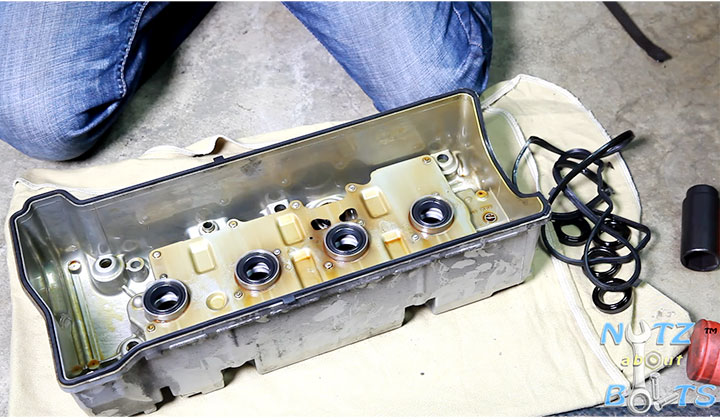
Prep And Clean The Engine Block
Clean the surface of the cylinder head and the entire engine block deck thoroughly with enamel cleaner. If you want to clean a surface with water and isopropyl alcohol, you can follow that up with water. Use a soft bristle brush to clean areas that are hard to reach or have oil buildup, carbon, or dirt.
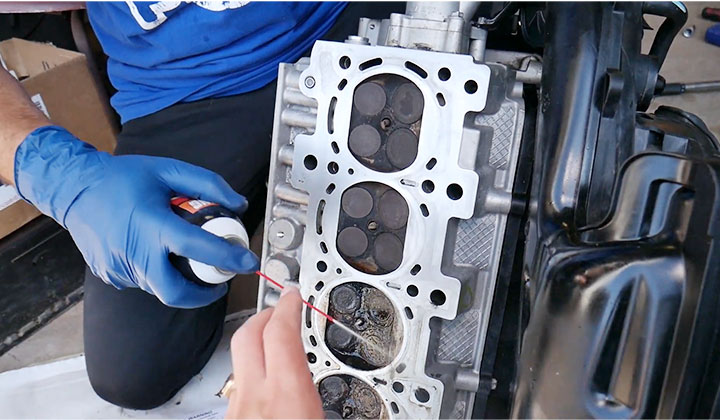
Clean The Threads Of Head Bolts And Studs
Reinstall the cylinder head after thoroughly cleaning the head bolts and stud threads and lightly lubricating them with engine oil. Doing this will reduce the strain on the cylinder head and engine block. Tightening them to the proper torque during reassembly will also be more accessible.
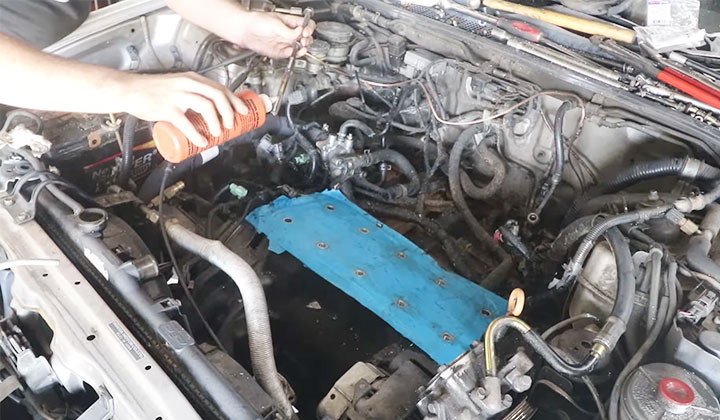
Gasket Installation
Ensure that the threads are installed in the correct places. It is essential to hand-tighten the threads until they are snug. Use the threads to guide the new gasket onto the engine block. You can now install the cylinder head, as it should fit properly into place.
Check for Fuel System Issues
Honda Accord owners may experience a few common problems with the car’s fuel system, such as an inability to start or loss of power while driving. Checking for these issues is essential before taking any further steps, and it can save you money in the long run.
If you notice any of these symptoms, it’s best to take your car to a mechanic for diagnosis and repair. Be sure to keep records of all repairs made on your vehicle so that future problems are easier to spot. Always use quality gasoline and maintain regular oil changes on your Honda Accord to help keep its engine running smoothly.
Remove Obstructions In Oil Path
If your Honda Accord isn’t starting, the first thing to check is the head gasket. To remove obstructions in the oil path, use a rag and some penetrating oil to clear away debris around the engine block and valve cover area.
Be sure to replace all of the seals when you do this work – especially if there’s been any leaking or damage previously. Keep an eye on your Honda Accord’s coolant level – low levels can indicate a problem with either the head or gasket, so a professional technician must check them out as soon as possible.
Avoid trying to fix things yourself if you don’t know what you’re doing – it could be hazardous.
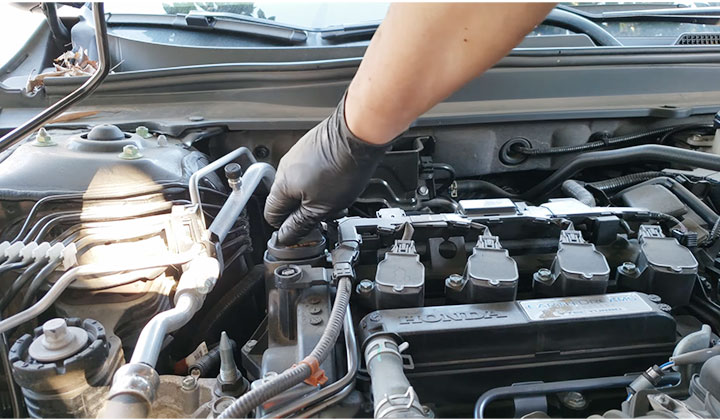
Open Cylinders One At A Time
Before you do anything, turn off the engine and remove the key from the ignition. Next, open each fuel rail in turn by using a screwdriver to lift one of the screws near it.
Carefully pull out each fuel rail until it separates from its bracket – be careful not to drop gasoline or oil onto yourself. Once all four rails are free, carefully lower them down into position and replace their screws (you may need to use a wrench).
Reconnect the battery lead before starting your car – otherwise, you’ll risk blowing a fuse.
Using Flathead Screwdriver Blade
Honda Accord head gaskets can fail for various reasons, including coolant leaks and engine overheating. If the head gasket fails, you may experience catastrophic engine failure.
To prevent this, carefully remove the camshaft cover plates using a flathead screwdriver blade to avoid damage to the engine block or pistons. Be careful not to scratch or dent the surface of your engine with these screws.
Once you have removed all the cover plates, cleaning everything thoroughly before replacing any parts on your Honda Accord is essential.
How much does changing a head gasket on a Honda Accord cost?
Head Gasket Replacement on a Honda Accord can cost anywhere from $1616 to $1870, depending on the part and labor costs involved. The average time to replace the head gasket is around 7 hours- though this may vary based on your car’s make and model.
If your car has over 100,000 miles on it, you will likely need new valve cover seals, which can set you back an additional $835. Overall, replacing a head gasket on a Honda Accord usually isn’t too expensive or complicated- but be prepared for potential delays if your car is older or has lots of miles on it.
Can you repair a head gasket yourself?
If you notice that your car’s engine is making a weird noise or the coolant level starts to drop rapidly, it may be time to replace a head gasket.
You can save money by following sealant dumping instructions before taking your car in for repair and understanding radiator cooling system repair tips.
Keep an eye on your car’s repair progress with these handy tips so you’re not stranded on the road.
Is it worth repairing my head gasket?
Repairing the head gasket may be a good idea if your car is worth thousands of dollars. If your vehicle is worth less than $10,000, replacing the head gasket probably isn’t worth it.
Whether to repair or replace your head gasket depends on your vehicle’s age, condition, and usage. Always have a mechanic check out your vehicle before deciding whether to repair or replace it.
Be aware that repairs may result in increased insurance rates.
How much is a head gasket for a 1998 Honda Accord?
A head gasket is a necessary part of your car’s engine and can fail, causing problems. Different head gaskets are available, and having the right one for your vehicle is essential.
Checking the size and condition of an ahead gasket is essential before making any repairs or purchasing a new one. If you experience difficulty starting your Honda Accord, it may be due to a failing head gasket – so be sure to check.
What can I use to seal a head gasket leak?
If you notice water coming through your head gasket, it’s essential to clean the area around the leak and apply a sealer to both the gasket and any threads that may be damaged.
Once the sealant is dry, replace your head gasket if necessary. Always follow manufacturer instructions when applying sealants so you don’t have a worse problem instead of fixing what already exists.
Is it hard to change the head gasket?
When replacing your head gasket, you must take the car apart and clean it thoroughly. Make sure you have the right tools for the job. It can be a complicated process if done incorrectly.
Disassembly may take hours or even days, so plan accordingly. Reassembly is often more involved than replacing the gasket itself-be prepared for that as well. Unless you’re an experienced mechanic, do not attempt this at home.
Do you have to remove the engine to replace the head gasket?
If you have head gasket problems, it is best to remove the engine entirely to replace it. Parts can be difficult to access, and some skill and experience may be required for this repair job.
Ensure that all of your tools are at hand before beginning work–this task may not go as planned without them. Inspecting and replacing the head gasket requires skill and experience; make sure you understand what needs to be done to achieve success.
It’s essential to have patience while working on this project, as it can sometimes be quite challenging. Also, be careful about oil filter housing while replacing the head gasket.
To Recap
If your Honda Accord is experiencing a head gasket issue, there are a few things you can do to try and fix it. First, you will need to remove the engine cover.
Then, it would be best to unscrew the bolts that hold the coolant in place. Finally, you will need to replace the head gasket.