The Honda Element has gained popularity among outdoor enthusiasts for its versatility and ruggedness, and the HRG Offroad lift kit takes its capabilities to the next level.
We will explore the step-by-step installation process, from removing the wheels to adjusting the suspension for the desired lift height.
We will also discuss post-installation considerations, such as alignment checks and testing the vehicle’s handling.
Additionally, we will provide valuable tips on maintenance, off-road driving techniques, and recommended accessories to enhance your outdoor experience.
Understanding the Hrg Offroad Lift Kit
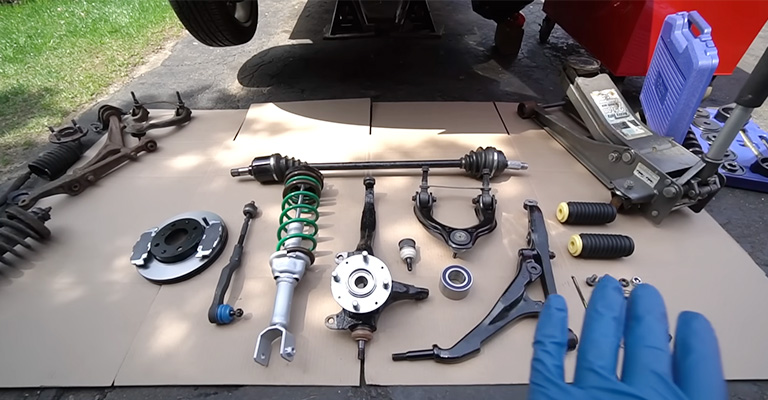
Explanation of the Lift Kit Components and Their Functions
1. Front spacers
These are designed to raise the front suspension of the Honda Element and provide additional ground clearance. They are typically made of durable materials such as steel or aluminum.
2. Rear spacers
Similar to the front spacers, rear spacers are installed to lift the rear suspension of the Element. They help level the vehicle and improve its off-road capabilities.
3. Suspension adjustments
The HRG Offroad lift kit may include additional components such as extended sway bar end links, longer shocks, or adjustable control arms. These components help optimize the suspension geometry and enhance the vehicle’s performance on rough terrain.
4. Hardware and instructions
The kit should include all necessary hardware, such as bolts, nuts, and washers, required for the installation. Detailed instructions or a manual should also be provided to guide you through the process.
Overview of the Lift Height and Suspension Adjustments
1. Lift height
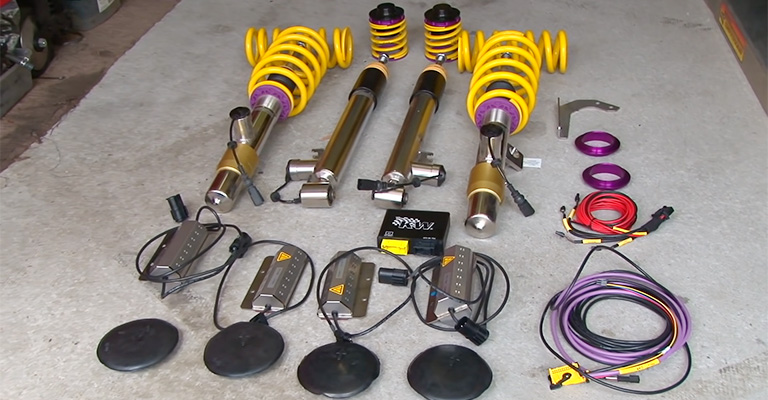
The HRG Offroad lift kit typically offers a specific lift height, such as a two-inch lift for the front suspension and a one-and-a-half-inch lift for the rear suspension. The lift height determines how much higher the vehicle will sit off the ground, providing increased clearance for obstacles.
2. Suspension adjustments
In addition to the lift spacers, the kit may include components that allow for further suspension adjustments. These adjustments can include fine-tuning the camber and toe angles, which affect the alignment of the wheels, and optimizing the suspension travel to improve off-road performance and stability. Understanding the components and their functions, as well as the lift height and suspension adjustments offered by the HRG Offroad lift kit, will provide you with the necessary knowledge to proceed with the installation process and make informed decisions regarding your Honda Element’s lift.
Preparing for the Installation
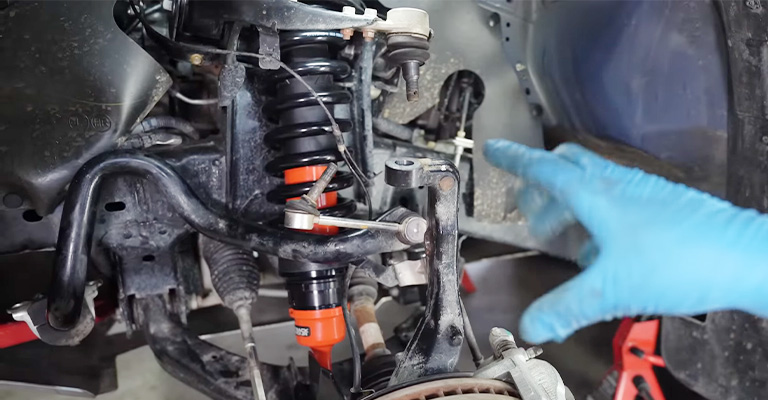
Gathering the Necessary Tools and Equipment
- Socket set and wrenches: Ensure you have a complete set of sockets and wrenches in various sizes to remove and install bolts and nuts.
- Torque wrench: A torque wrench is essential for tightening bolts to the manufacturer’s recommended specifications.
- Jack and jack stands: These are needed to lift the vehicle safely and provide stability during the installation process.
- Pry bar or breaker bar: Useful for removing stubborn bolts or providing leverage when needed.
- Screwdrivers: Both flathead and Phillips screwdrivers may be required for specific tasks.
- Pliers: Have a set of pliers, including regular and needle-nose, for various gripping and maneuvering tasks.
- Hammer and rubber mallet: These tools can be useful for tapping or gently knocking components into place.
- Lubricants and penetrating oil: It’s advisable to have some lubricants and penetrating oil on hand to ease the removal of rusted or stuck parts.
- Safety equipment: Wear safety goggles, gloves, and appropriate clothing to protect yourself during the installation process.
Precautions and Safety Measures to Consider
- Read the instructions: Familiarize yourself with the instructions provided by the HRG Offroad lift kit manufacturer. Understand the steps involved and any specific precautions or warnings mentioned.
- Secure the vehicle: Before beginning any work, park the Honda Element on a flat surface and engage the parking brake. Use wheel chocks to prevent the vehicle from rolling.
- Lift the vehicle properly: Use a jack and jack stands to lift the vehicle, following the manufacturer’s instructions for safe lifting points. Ensure the vehicle is stable and secure before starting the installation.
- Work in a well-ventilated area: If you’re working indoors or in a garage, ensure there is proper ventilation to avoid inhaling fumes from lubricants or other chemicals.
- Use caution when working with suspension components: Suspension parts can be under tension and may suddenly release when loosened or removed. Take necessary precautions and avoid putting yourself in the path of any potential hazards.
- Torque bolts to specifications: Use a torque wrench to tighten bolts according to the manufacturer’s recommended torque specifications. This will ensure proper installation and prevent over-tightening or under-tightening.
- Test the installation: After completing the installation, conduct a thorough check of all connections and components. Double-check that all bolts are properly tightened and secure. Perform a test drive in a safe area to evaluate the vehicle’s handling and ensure everything is functioning as intended.
Step-by-step Installation Guide
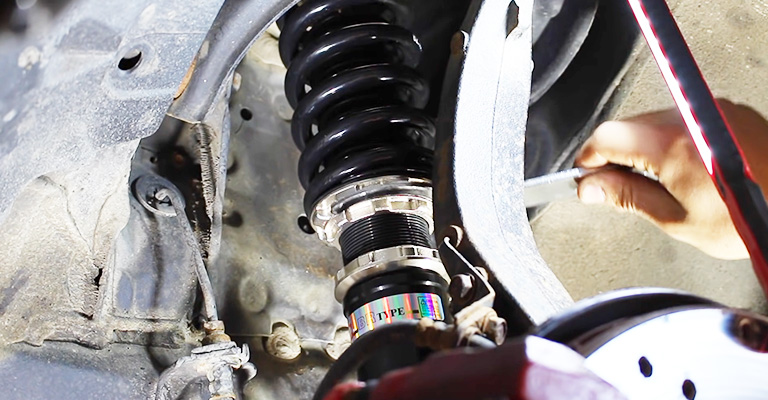
Removing the Wheels and Preparing the Vehicle for Lifting
- Park the Honda Element on a flat surface and engage the parking brake.
- Use a jack to lift one side of the vehicle, following the manufacturer’s recommended lifting points.
- Place jack stands under the vehicle to provide stability and support.
- Repeat the process to lift the other side of the vehicle.
- Remove the lug nuts and take off the wheels, setting them aside in a safe place.
Installing the Lift Kit Components on the Front Suspension
- Locate the front suspension components, including the front spacers provided in the HRG Offroad lift kit.
- Begin with one side of the vehicle and place the front spacer on top of the front suspension assembly.
- Align the bolt holes on the spacer with the corresponding holes on the suspension assembly.
- Insert the provided bolts through the holes and tighten them securely using a torque wrench, following the manufacturer’s recommended torque specifications.
- Repeat the process on the other side of the front suspension.
Installing the Lift Kit Components on the Rear Suspension
- Locate the rear suspension components, including the rear spacers provided in the lift kit.
- Begin with one side of the vehicle and place the rear spacer on top of the rear suspension assembly.
- Align the bolt holes on the spacer with the corresponding holes on the suspension assembly.
- Insert the provided bolts through the holes and tighten them securely using a torque wrench, following the manufacturer’s recommended torque specifications.
- Repeat the process on the other side of the rear suspension.
Adjusting the Suspension to Achieve the Desired Lift Height
- Once the lift kit components are installed, evaluate the lift height achieved.
- If necessary, make further adjustments using any additional components provided in the lift kit, such as extended sway bar end links, longer shocks, or adjustable control arms.
- Follow the manufacturer’s instructions for adjusting the suspension components, ensuring proper alignment and functionality.
Reinstalling the Wheels and Performing a Final Check
- Place the wheels back onto the wheel hubs and hand-tighten the lug nuts.
- Lower the vehicle from the jack stands using a jack, carefully and slowly.
- Use a torque wrench to tighten the lug nuts to the manufacturer’s recommended torque specifications.
- Perform a final check of all connections and components to ensure they are secure and properly installed.
- Take the vehicle for a test drive in a safe area, paying attention to the handling and ride quality to ensure everything is functioning as intended.
Post-installation Considerations
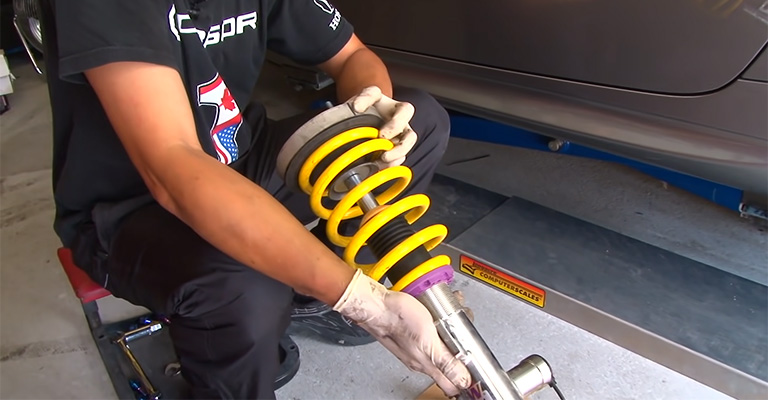
Checking for Proper Alignment and Tire Clearance
- After installing the lift kit, it’s essential to check the vehicle’s alignment. Improper alignment can lead to uneven tire wear and affect the vehicle’s handling and stability.
- Take the Honda Element to a professional alignment shop to ensure that the suspension components are properly aligned and adjusted according to the manufacturer’s specifications.
- Additionally, check for sufficient tire clearance. Verify that the tires do not rub against any suspension or body components during turns or when the suspension is compressed.
Testing the Vehicle’s Handling and Ride Quality
- Once the lift kit is installed and alignment is checked, take the Honda Element for a test drive in various conditions, including different road surfaces and speeds.
- Evaluate the vehicle’s handling, stability, and responsiveness. Note any changes in the ride quality, such as increased body roll or changes in steering feel.
- Pay attention to how the vehicle handles bumps and uneven terrain, as the lift kit may impact the suspension’s ability to absorb impacts and provide a comfortable ride.
Potential Modifications or Upgrades to Complement the Lift Kit
- Consider additional modifications or upgrades to optimize the Honda Element’s performance and enhance the off-road capabilities.
- Upgrading to larger tires and wheels can provide increased ground clearance and improved traction.
- Installing skid plates or protective armor can help safeguard critical components from potential damage during off-road adventures.
- Upgrading the suspension components, such as shocks or struts, can further enhance the vehicle’s off-road capabilities and ride quality.
- Research and consult with reputable aftermarket manufacturers and off-road enthusiasts to explore potential modifications that suit your specific needs and preferences.
Taking the time to check alignment, tire clearance, and thoroughly test the vehicle’s handling and ride quality will ensure that the HRG Offroad lift kit is installed correctly and functioning optimally.
Exploring additional modifications or upgrades can further enhance the Honda Element’s off-road performance and overall driving experience.
Tips and Recommendations
Maintenance and Care for the Lifted Honda Element
- Regularly inspect the lift kit components, including spacers, bolts, and suspension components, for any signs of wear, damage, or looseness. Address any issues promptly.
- Follow the manufacturer’s recommended maintenance schedule for the Honda Element, including oil changes, fluid checks, and filter replacements.
- Pay attention to the suspension system and ensure it remains properly lubricated. Consult the lift kit manufacturer’s guidelines for recommended lubrication intervals and products.
- Regularly clean the lift kit components and undercarriage to remove dirt, debris, and corrosive substances that can accumulate during off-road adventures.
- Periodically check the torque of the bolts securing the lift kit components to ensure they remain tight and secure.
Off-road Driving Tips and Precautions
- Familiarize yourself with the capabilities and limitations of your lifted Honda Element. Understand the increased ground clearance and suspension modifications and adjust your driving accordingly.
- Before embarking on off-road adventures, research the terrain and trail difficulty to ensure it aligns with your vehicle’s capabilities. Start with easier trails and gradually progress to more challenging ones as you gain experience.
- Drive at a safe and controlled speed, especially over rough terrain. Slow down and use caution when encountering obstacles or steep inclines.
- Use proper off-road driving techniques, such as maintaining a steady throttle, avoiding sudden steering inputs, and utilizing low-range gears when necessary.
- Always be prepared with essential recovery equipment, including a recovery strap, traction aids, a shovel, and a portable air compressor. Familiarize yourself with their usage and practice safe recovery techniques.
Recommended Accessories for an Enhanced Outdoor Experience
- Roof rack or cargo carrier: Increase your storage capacity for outdoor gear, camping equipment, and other essentials.
- Off-road lights: Enhance visibility during nighttime off-road excursions and improve safety.
- Skid plates: Install protective skid plates to safeguard critical components, such as the engine, transmission, and fuel tank, from potential damage.
- Winch: Consider adding a winch to your Honda Element for self-recovery or assisting others in difficult situations.
- All-terrain tires: Upgrade to all-terrain tires with more aggressive tread patterns to improve traction and handling in various off-road conditions.
Conclusion
lifting a Honda Element with the HRG Offroad lift kit opens up a world of possibilities for outdoor enthusiasts. The lift kit components, including spacers and suspension adjustments, provide increased ground clearance, allowing the Element to conquer challenging terrain with ease.
Throughout the installation process, it is crucial to gather the necessary tools, follow safety precautions, and refer to the manufacturer’s instructions for a successful installation.
After installation, it is important to check for proper alignment, tire clearance, and conduct thorough testing to ensure the vehicle’s handling and ride quality are optimized.
Consider additional modifications or upgrades, such as larger tires, protective armor, or suspension enhancements, to further enhance the off-road capabilities.
Maintaining and caring for the lifted Element, practicing safe off-road driving techniques, and investing in recommended accessories will enhance the vehicle’s performance and your outdoor experiences.
Embrace the adventure, push the limits, and enjoy the freedom that comes with lifting your Honda Element with the HRG Offroad lift kit.


