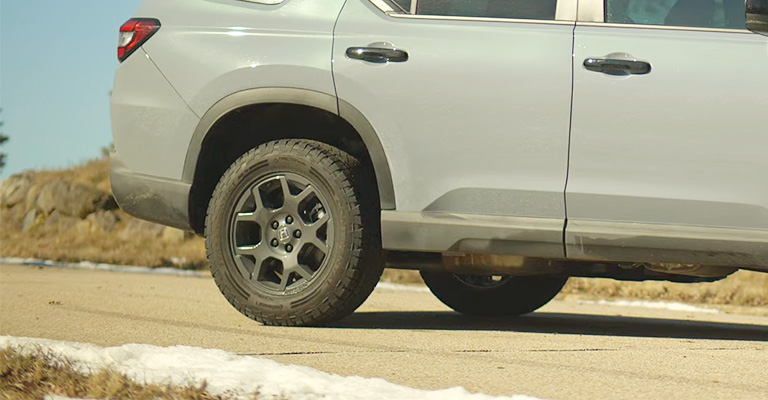
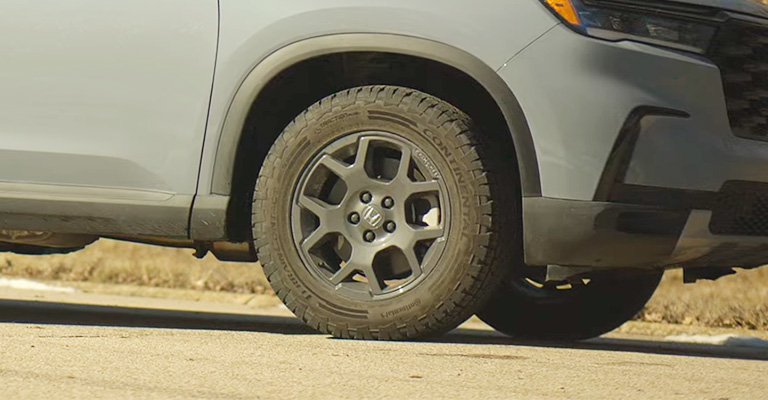
The Honda Pilot is a popular mid-size SUV that is known for its spacious interior, comfortable ride, and reliable performance. If you’re looking to customize your Pilot with new wheels or tires, it’s important to know your vehicle’s bolt pattern.
The bolt pattern refers to the number of lug nuts on your vehicle’s wheels and the distance between them, and it plays a crucial role in determining which wheels are compatible with your Pilot.
Understanding the Honda Pilot bolt pattern can help you choose the right aftermarket wheels or tires and ensure a safe and secure fit on your vehicle.
We will explore the Honda Pilot bolt pattern in detail, including the specific measurements and factors to consider when selecting new wheels for your SUV.

List of Honda Pilot Models and Their Respective Bolt Patterns
Here is a list of Honda Pilot models and their respective bolt patterns
- Honda Pilot 3.5L (2003-2007): 5×114.3 bolt pattern
- Honda Pilot 3.5L (2008-2010): 5×120 bolt pattern
- Honda Pilot 3.5 (2008-2018): 5×120 bolt pattern
- Honda Pilot 3.5 4WD (2008-2018): 5×120 bolt pattern
- Honda Pilot 3.5 4WD (2018-2023): 5×120 bolt pattern
- Honda Pilot 3.5i V6 (2002-2008): 5×114.3 bolt pattern
It’s important to note that bolt pattern is the number of bolts and the distance between them on the wheel, determining whether a wheel is compatible with a specific car. So, ensuring that the wheel you want to purchase has the correct bolt pattern for your Honda Pilot model is crucial.

Here is a table that shows the Honda Pilot model name, displacement, and corresponding bolt pattern
| Honda Pilot Model Name and Displacement | Bolt Pattern |
|---|---|
| Honda Pilot 3.5L (2003-2007) | 5×114.3 |
| Honda Pilot 3.5L (2008-2010) | 5×120 |
| Honda Pilot 3.5L (2011-2018) | 5×120 |
| Honda Pilot 3.5 (2008-2018) | 5×120 |
| Honda Pilot 3.5 4WD (2008-2018) | 5×120 |
| Honda Pilot 3.5 4WD (2019-2023) | 5×120 |
| Honda Pilot 3.5i V6 (2002-2007) | 5×114.3 |
Note: The bolt pattern refers to the number of lug holes and the circle diameter they form. In the case of the Honda Pilot, the bolt pattern is measured in millimeters and refers to the distance between two lug holes that are directly across from each other on the wheel.
Other Fitment Specs You Should Know
In addition to the bolt pattern, you should be aware of a few other fitment specifications when selecting wheels for your Honda Pilot. These include:
Center Bore
This is the hole’s diameter in the wheel’s center that fits over the vehicle’s hub. The center bore of the Honda Pilot is 64.1mm.
Wheel Offset
This is the distance between the hub mounting surface and the wheel’s centerline. The Honda Pilot has a wheel offset of 40-50mm, depending on the model year and wheel size.
Tire Size
The tire size for the Honda Pilot varies depending on the model year and wheel size. It can range from 235/70R16 to 245/65R17.
It’s important to ensure that the wheels you choose have the correct center bore, offset, and tire size to ensure a proper fit and safe driving experience.
Honda Pilot Other Fitment Specs Per Generation
Here’s a table for Honda Pilot Other fitment specs per generation
| Generation | Production Years | Center Bore | Thread Size | Lug Nut Torque | Wheel Fastener Type |
|---|---|---|---|---|---|
| 1st | 2003-2008 | 64.1 mm | M12 x 1.5 | 80 ft-lbs | Lug Nuts |
| 2nd | 2009-2015 | 64.1 mm | M14 x 1.5 | 80 ft-lbs | Lug Nuts |
| 3rd | 2016-2022 | 64.1 mm | M14 x 1.5 | 80 ft-lbs | Lug Nuts |
Why Knowing Blot Pattern is Important?
Knowing the bolt pattern of a vehicle is important for several reasons
Wheel Replacement
When it’s time to replace your vehicle’s wheels or upgrade to a different style, you need to make sure that the new wheels’ bolt pattern matches your vehicle.
If the bolt pattern doesn’t match, the new wheels won’t fit correctly and can cause problems like vibration, wheel damage, and even unsafe driving conditions.
Tire Replacement
The bolt pattern also affects the choice of tires that you can use on your vehicle. You need to choose tires that match the bolt pattern of your wheels, or you won’t be able to mount the tires on your wheels correctly.
Wheel Spacers and Adapters
Some car enthusiasts like to use wheel spacers and adapters to change the offset or fitment of the wheels. Knowing your vehicle’s bolt pattern is important in this case, as you need to choose spacers and adapters that match your vehicle’s bolt pattern.
Knowing your vehicle’s bolt pattern is crucial for ensuring your wheels and tires’ proper fitment and performance.
How to Measure the Honda Pilot Bolt Pattern
To measure the bolt pattern of a Honda Pilot, you will need to follow these steps
- Gather the necessary tools, a tape measure or ruler, and a bolt pattern gauge or caliper (optional).
- Ensure that your vehicle is parked on a level surface and the wheels are securely choked.
- Remove the wheel you want to measure using a lug wrench to loosen the lug nuts, then lift the wheel off the ground.
- Locate the bolt pattern on the wheel hub, where the studs are attached to the hub.
- Measure the distance between two opposite studs that are directly across from each other using a tape measure or ruler. Be sure to measure from the center of each stud, not from the edges.
- If you have a bolt pattern gauge or caliper, place it over the studs to determine the bolt pattern more accurately.
- Count the number of studs on the wheel hub to determine the bolt pattern. Honda Pilots typically have a 5-lug bolt pattern.
- Check for any exceptions that may apply to your specific vehicle model, trim level, and year. Some Honda Pilots may have different bolt patterns depending on these factors.
- Repeat this process for each wheel on your vehicle to ensure that all of your wheels have the same bolt pattern.
Knowing your Honda Pilot’s bolt pattern is important because it ensures that the wheels you purchase will fit your vehicle properly.
Using wheels with the wrong bolt pattern can cause problems such as poor handling, increased tire wear, and even accidents. It is always best to verify your vehicle’s bolt pattern before purchasing new wheels.
How to Tighten Honda Pilot Bolts
Properly tightening the bolts on your Honda Pilot is essential to ensure the safety and reliability of your vehicle. Here is a detailed guide on how to tighten the bolts on your Honda Pilot
Gather the Necessary Tools and Equipment
You will need a torque wrench, a socket wrench, and a set of sockets that match the size of your lug nuts.
Determine the Torque Specifications
The recommended torque specifications for your Honda Pilot can be found in the owner’s manual or by consulting a reputable source. Using the correct torque specifications is important to avoid over-tightening or under-tightening the bolts.
Loosen the Lug Nuts
Use the socket wrench to loosen the lug nuts you want to tighten on the wheel. Be sure to loosen them in a star pattern rather than all at once.
Tighten the Lug Nuts by Hand
Use your fingers to tighten each lug nut by hand until they are snug.
Use the Torque Wrench
Set the torque wrench to the recommended torque specification for your Honda Pilot. Then, use the socket wrench to tighten each lug nut to the correct torque specification. Be sure to tighten them in a star pattern rather than all at once.
Double-check the Torque
Once you have tightened all the lug nuts, double-check the torque on each one to ensure they are all properly tightened. If necessary, make any additional adjustments using the torque wrench.
Exceptions
It’s important to note that some Honda Pilot models may have unique torque specifications or bolt patterns depending on the year, trim level, or other factors. Always consult the owner’s manual or a reputable source to ensure you use the correct specifications for your specific vehicle.
Some Honda Pilot models may also have special lug nuts that require a unique key to remove or tighten. If your vehicle has special lug nuts, be sure to use the appropriate key and follow the manufacturer’s instructions.
Final Words
Understanding the Honda Pilot bolt pattern and other fitment specifications is crucial when it comes to installing new wheels and tires or performing any modifications that require changing the vehicle’s bolt pattern. It ensures that the wheels are safely and securely attached to the vehicle, preventing accidents and damage.
It is also important to tighten the bolts to the recommended torque specifications to avoid over-tightening or under-tightening, which could lead to wheel failure or other issues.
By following the recommended procedures and guidelines, you can maintain the safety and integrity of your Honda Pilot and enhance its performance and aesthetics without compromising on reliability.
Check Other Honda Models Bolt Pattern –

Leave a Reply